Friday, May 29, 2009

Roses and Rearranging

Above: Beautiful roses from my wonderful husband!

After about a year in our little rental house, I finally decided that it was time to move around the furniture in the living room and dining room. Our house was built in the 1920's as a farmhouse and has some unique features. For example, although the house itself is quite large, the kitchen is tiny. There is no central heating, but instead we have built in electric heaters in each room. Another interesting feature is that there is just one long narrow rectangular space for the dining room and living room. 

For most of the past year we set up the dining room right outside of the kitchen door and put together a little living room on the opposite side of the long room. However, recently it began to seem to me that we really ought to separate the living room and dining room a bit more. To accomplish that, I moved our one couch away from the wall and placed it as a divider between the dining room and living room. I also brought up a rocking armchair that I got for free from a family I babysat for a few years ago. It used to live in the family room downstairs, but now it seems so nice to have another comfortable chair in the living room (see below). 

Note: Woodley is the one learning to play the harp. I got him harp lessons for his birthday last year and he is making impressive progress! It turns out that harps are ridiculously expensive but you can actually rent them for fairly reasonable rates. It's so nice to hear him practice as I work around the house!

The living room still needs more work before it will feel really put together, but at least it now feels like it's own space and 3 or 4 people can sit together and have a conversation. 

With the couch dividing our main room there was then less space for the dining room. Since it was a bit tight getting around the table, I removed one leaf and it suddenly fit perfectly. Since we rarely have more than two couples over for dinner at the same time, I think the new arrangement will work very well. 

After our wedding reception last year, I had a ton of doilies left and didn't know what to do with them. (I had used them under the vases to help decorate the dinner tables.) Woodley picked out these tan chairs a couple of years ago and we bought a few extra when we moved in together after getting married. Although they are very soft and comfortable, I thought they looked a little too straight and modern. To help soften them and give them a cottage air I picked out a few of my favorite doilies and laid them over the back. I liked the effect quite a bit and have kept them. 

And now, one more picture of those lovely roses!


~ElizabethRose

Piecing Sammy's Quilt

Back in January, Woodley and I hosted a baby shower for our dear friends Patty and Edo who were expecting their first child. I planned to sew a quilt for the baby and had pieces of quilting fabric and fabric pens ready at the baby shower for an activity. I asked all of the guests to write a special message to the baby on the pieces of fabric and later at the shower we all read them to Patty and Edo. 

Little Sammy was born in early February and I am sorry to say that I have yet to finish his quilt. I've been working on it here and there and I have a general plan but I really need to buckle down and get it pieced. 

For awhile I was worried that I wouldn't be able to find a convenient way to sew up the hexagons I had asked the guests to write on. Woodley came to the rescue though and suggested I add triangles to three sides to create larger triangles which could easily be sewn together. I found some pale blue fabric covered with robots and rocket ships that matched the shades of the hexagons. 

Here's one of the finished hexagon-triangles (note the special message for the baby!): 

I had enough triangles to make 5 large hexagons and I am now trying to decide which fabric I should use for the background behind the hexagons. I can't quite decide. The first option is Amy Butler's Martini Yellow Fabric: 


The second option (which I may be leaning towards) is Linework Robots by David Walker for Free Spirit:


My goal is to finish up the quilt by the beginning of August (which shouldn't be hard if I actually start spending some time working on it). Let me know if you have any ideas about which fabric I should pick!

Thanks!

~ElizabethRose


Red Clover

I discovered this beautiful red clover in a patch of tall grass as I walked down to get the mail the other day. It stood out so beautifully against the green grass that I just had to capture a picture of it. A couple of days later I discovered that the tall grass had been cut down to the ground and the clover was gone. I'm so glad I got a chance to see the this little spot. Sometimes it just seems like things change so quickly.

~ElizabethRose

Leila and The New Couch

There's no doubt about it, Leila loves our new couch (the one we bought at the silent auction at The Aquarium). Unfortunately, the combination of her love of the couch, her need to stretch, her claws, and the nice weave of the couch's upholstery, is a recipe for disaster. Although I don't think she means to scratch the couch, we noticed very quickly that it was looking worse for wear after a few rounds of her stretches. 

To try to deter her I quickly covered the couch with a collection of towels and tablecloths. It worked. She no longer used the couch for stretching/scratching purposes. And, as you can see from the pictures, she looked quite charming nestled amongst the linens. The only problem was that the living room looked very, very messy. 

We lived with the messy looking couch for a couple of weeks before we decided to exile the couch to the family room downstairs, which is off-limits to Leila. Sadly, she'll only be with us for a few more weeks but, once she goes back to Valicia, we can enjoy our couch in its full glory. 


~ElizabethRose

Juice and Smoothies in the Morning

A couple of months ago my wonderful Woodley came home with a fancy new juicer for us to use. That, combined with my lovely turquoise blender has made for some very yummy breakfasts for us. I also invested in a copy of "The Big Book of Juices and Smoothies." I don't manage it every morning but, whenever possible, I try to make us a smoothie and a juice each morning. Lots of the recipes in the book have only 2 or 3 ingredients and almost all have been quite delicious! It's really fun to try out various combinations of fruits and vegetables that I would never think to combine on my own. The next time we hit upon a particularly good combo I'll take some photos and share the recipe. 

I can't wait till we have a bigger kitchen this summer. In our kitchen the combo of the blender and juicer take up the entire countertop. I suppose that is partially a good thing though because it encourages me to clean it all up each morning after breakfast. 

~ElizabethRose

Roasted Beets

This past Wednesday we got 3 lovely golden beets in our CSA box. That evening we were to go over to our friends Patty and Edo's house for dinner and I had volunteered to bring a vegetable side dish. The last time we got beets in our box they sat in the refrigerator for about a month until I finally juiced them and drank them. :) This time I decided to be more proactive. 

In our copy of The Joy of Cooking, 2006 edition, I found an easy recipe for Baked or Roasted Beets which turned out so wonderfully that I just had to share it! The they tasted fabulous and it was so easy to toss this recipe together.

Baked or Roasted Beets
from The Joy of Cooking, 2006 edition, page 259
4 servings 

1 pound beets, stems trimmed to 1 inch
Salt and black pepper or paprika
2 tablespoons melted butter, olive oil, or walnut oil {I used olive oil}
1 tablespoon minced parsley, chives, or dill {I used dill from the garden}
Fresh lemon or lime juice to taste 

Preheat the oven to 350 degrees F. Place the beets and 1/2 cup water in an 8-inch square baking pan (or another small pan). Cover the pan tightly with aluminum foil and bake until the beets are easily pierced with a thin skewer or knife tip, about 45 minutes for small beets, 1 hour for medium, and 1 1/4 hours for large beets. 

Slip off the skins, and leave the beets whole or slice them into rounds or wedges. Season with salt and pepper. Toss with the butter or oil, herb(s), and juice to taste. 

I simply love the color! They were a big hit at dinner. :)

~ElizabethRose

Petit Fours and A Memorial Day Picnic

Last weekend I had a delightful adventure making petit fours with my friend Becca. She is a big fan of these small treats and had always wanted to make them. 

Earlier last week Woodley and I had hoped to fly up to Bellingham for the weekend, but we delayed too long and couldn't get tickets. Similarly, Becca also had weekend plans that fell through leaving us both with a blank long weekend. We decided to put our time to good use making petit fours for a Memorial Day picnic on Monday. Little did we realize what we were in for!

As it turns out, petit fours are amazingly complicated to make and we spent at least 20 hours over the course of 3 days making ours. (Mostly that was probably my fault because I had so much fun making the cake for the first batch that I suggested we make 2 other kinds. Silly me!)

I don't have too many pictures of the process yet because they are still on Becca's camera, but I'll post more later. In the meantime, here's the petit four making process, in a nutshell (We used the Joy of Cooking for our recipes): 

1. Bake a fairly complicated cake in a jelly roll pan lined with parchment paper. (we made a Milk Sponge Cake, a Chocolate Genoise Cake, and a White Lady Cake). When the cake comes out of the oven, cover the top with aluminum foil and flip it over 180 degrees as you remove it from the pan so that the parchment paper is at the top and the foil is at the bottom. Allow the cake to cool. 

2. Carefully remove the parchment paper and aluminum foil from the cooled cake. As you peel it of, you should remove the dark brown layer from the top and bottom of the cake. Cut the cake into 3 equal sized pieces. 

3. Brush the bottom two pieces of cake with jelly (or another filling of your choice, we used raspberry jelly and rhubarb orange jelly). If you are using a Genoise Cake you should also brush the layers with moistening syrup before applying the jelly filling. Stack the 3 layers on top of each other. 

4. Cover the cake with saran wrap, top with a baking pan, fill the pan with as many canned goods as will fit, and stick the whole stack in the refrigerator to compact. (I found this step very amusing because the cakes that we had just taken such pains to make light and fluffy were then squished overnight to remove any extra lightness an air.)

5. Remove the compacted cakes from the refrigerator and remove the saran wrap. Brush the top layer with jelly filling and cover with a 1/8th inch layer of marzipan. 

6. Cut the petit fours into 1x1 inch squares. 

7. Make a glaze topping to be used to cover the petit fours. (We had some trouble with this but ended up making 3 different types of glazes, a bittersweet chocolate glaze, a fondant glaze, and a white chocolate glaze. They all tasted very unique and different.)

8. Glaze the petit fours by dribbling the liquid glaze over them or by dipping them into a big bowl of glaze using chop sticks (I used the later method and it worked quite well). Allow the petit fours to drip and dry on a cooling rack. 

9. Decorate the petit fours as you wish. (We used a sliver of almond for some and ball candy decorations for others.)

9. Eat them right away or refrigerate for later. 

Whew!!! I sincerely doubt I will attempt those again unless I someday have a little girl who really really really wants to learn to make them for a tea party.

We also decided to make some tea sandwiches for our tea party picnic. We made: Smoked Salmon Pinwheels, Egg Salad Sandwiches, Cucumber Sandwiches, and Curried Chicken Salad Sandwiches. 

Here I am preparing the Smoked Salmon Pinwheels. I rolled out a large piece of white bread to flatten it, spread it with cream cheese, and am now covering it with watercress leaves before adding the salmon and a dash of lemon juice:

Here are the curried chicken salad sandwiches in the making:

Woodley helped us get some nice tiered serving trays (from Target). They worked perfectly for serving the sandwiches and petit fours!

A big beautiful tray of petit fours!

At the picnic:

Here's a close up of the Lady Cake Petit Fours filled with either Raspberry Jelly or Rhubarb Orange Jelly and glazed with Fondant Icing. 

Here are the Chocolate Genoise Cake Petit Fours filled with Raspberry Jelly and covered with a Bittersweet Chocolate Glaze.

And here, on the left, are the Milk Sponge Cake Petit Fours filled with Raspberry Jelly and covered with a White Chocolate Glaze. 

All the petit fours tasted amazingly rich and delicious so we considered all our hard work a big success. And it was such a perfect day for a picnic!!

~ElizabethRose

Thursday, May 21, 2009

The Hard Task of Photo Selection

For almost a year now we've been putting off the daunting task of selecting 60 of our wedding photos to go into our professional wedding album. Since the deadline is our 1 year wedding anniversary, which is rapidly approaching (less than 1 month now!), I finally forced myself to do it this week. 

I absolutely love so many of our photos that it was terribly difficult to pare them down to just 60. To help make the process easier, I laid out my top 100 or so on the dining room table and then had Woodley and our friend Becca help me narrow it down by flipping over the ones we wanted to eliminate. Eventually we were able to get it down to 60, but it was hard! 

Leila was very curious about it all and managed to slip into a picture by jumping up on the table very quickly. She knows she isn't allowed on the table and she was hastily removed once the photo was taken. What a curious kitty!

I've been thinking a fair amount about our wedding lately. I think it's because our 1 year anniversary is coming up and we also have a few friends who will be getting married in the next month or so. I actually just attended a bridal shower last weekend and there were several other newly married women there as well. It was fun to spend some time with them!

I've been thinking about doing a series of posts featuring what was going on with us 1 year ago. Since I haven't yet done anything to record my memories from the wedding planning, wedding day, and honeymoon time, this seems like a good way to do so. It was such a process! 

I'm also trying to figure out what would be a good way to celebrate our 1 year anniversary. We're planning to spend a weekend down in Big Sur, where we were married, but I'd like to get Woodley something. Since a piece of computer hardware or telescope equipment seems hardly appropriate (my normal gifts for him) I'm a bit stuck. Maybe a tie would work out well... 


I'm so excited to see our finished wedding album (even though it will be several months before it arrives). Maybe I'll also be inspired to print out some bigger copies of special wedding photos have framed! That would really be accomplishing something since the only 2 photos we have on display are ones my mom printed out and sent to us! :)

Oh, and our photographer, who we have to thank for all these beautiful images, was Augie Chang of San Francisco. If you are in search of a wonderful wedding photographer we would definitely recommend him.

~ElizabethRose

Tuesday, May 19, 2009

Gardening Update

Every time I head out to water our plants I am completely amazed at how big they are growing (considering that they were tiny seeds just a few months ago). I guess it shows how little gardening I have done in the past. :) Here's a photo update on our plants:

This is the saddest plant we have. It's one of the cherry tomato plants I started back in March with my herbs.

I couldn't figure out why it was doing so poorly until Woodley discovered that somehow the stem had been almost entirely severed from the roots. So sad!! Fortunately we still have 2 other cherry tomato plants that are doing quite well, such as this one:

Here are the 4 other pots of herbs and flowers. They seem to be growing quite well, although one of the tiny thyme plants seems to have been eaten by the peacock. Speaking of which, the peacock has disappeared and we have no idea where he went. 

And now, on to our vegetable garden. Here's Box Number 1 with the squash, swiss chard, beets, cucumbers and tiny pepper plants. They seem to be growing well. 

Box Number 2 isn't doing nearly as well. It is mostly planted with lettuce and sadly some of the plants never sprouted and several of the others are being enjoyed by some local bug. In a few more weeks we will have a little bit of lettuce though and I've replanted other types in the areas that didn't ever sprout. 

Box Number 3 is probably the most impressive right now (the kitty seems to agree). It features a bunch of different types of bush beans, some corn, sugar snap peas, and cucumbers.

Here's the biggest corn stalk: 

A happy bush bean:

The almost out of control sugar snap peas: (Since I took this picture Woodley built a little trellis for them to grow up and they are looking much happier now.)

And the amazingly large squash:

It will be interesting to see if any of them are actually ready to harvest before we move up to Washington for the summer. They have a month and a half to go and I hope some of them make it! If not, I'm sure the neighbors will enjoy the fresh veggies. 

~ElizabethRose

Monday, May 18, 2009

Fish Tacos and Corn Salad

I was so inspired by the fish tacos we had at Cooking For Solutions on Friday night, that when I came across a Fish Taco recipe this morning, as I was planning our menu for the week, I knew I had to try them! I also discovered a Corn Salad recipe that went perfectly with the tacos. Below are both recipes along with some pictures of the process. 

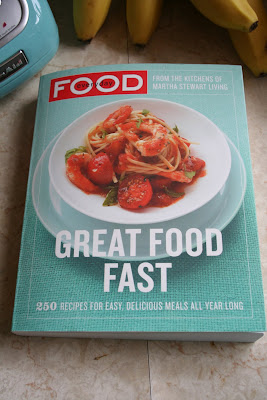
Both recipes come from the cookbook "Everyday Food: Great Food Fast" from the Kitchens of Martha Stewart. I received it as a bridal shower present about a year ago and it is full of quick easy recipes with beautiful pictures. 

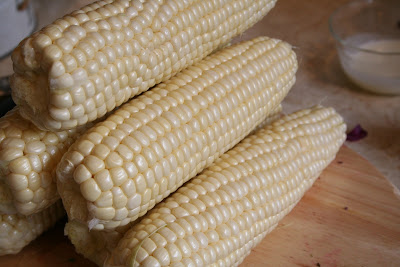
First, the Corn Salad. This recipe was super easy to make and was a big hit at dinner. For some reason I had forgotten that you can eat corn before it has been cooked but this salad definitely makes good use of that feature. Since corn is one of Woodley's favorite foods, I think this will become a summer staple at our house. 

Corn Salad 
From Everyday Food: Good Food Fast 
Martha Stewart 
4 Servings | 15 minute prep time

6 ears of corn, husks and silk removed
3 scallions, thinly sliced crosswise (1/2 cup)
2 tablespoons white-wine vinegar 
2 tablespoons olive oil 
coarse salt and fresh ground pepper 

1. To remove the kernels, cut off the tip of each cob; stand the cob in a wide shallow bowl. With a sharp knife, slice downward to remove the kernels. 

2. To the bowl, add the scallions, vinegar, and oil. Season generously with salt and pepper. 

3. Toss to combine. Serve, or cover and refrigerate up to one day. 

{And there you have it! It's amazing that something so simple can taste so good!}


Fish Tacos 
From Everyday Food: Good Food Fast 
Martha Stewart 
Serves 4 | 45 minute prep time {I think it might take up to 60 minutes}

1/4 cup reduced-fat sour cream 
2 tablespoons fresh lime juice 
coarse salt and freshly ground pepper
1/4 small red cabbage, thinly shredded (about 2 1/2 cups) 
4 scallions, thinly sliced (about 1/2 cup)
jalapeño chile, halved lengthwise, one half minced {our family doesn't really care for spicy foods so I left out the chile}
2 tablespoons olive oil 
1 pound tilapia fillets (or other firm white fish), cut into 16 equal strips
8 flour tortillas (6-inch) {I used 10 corn tortillas instead and they worked great!}
1/2 cup fresh cilantro leaves 

{I just love limes!}

1. In a large bowl, combine the sour cream and lime juice; season with salt and pepper. Transfer half the mixture to another container; set aside for serving. 

2. Toss the cabbage, scallions, and minced jalapeño with the remaining sour-cream mixture. Season again with salt and pepper. 

{As I was cutting up the cabbage I was reminded of the time, back in high school, when I volunteered as a science teacher at a local summer camp. I cooked a bunch of red cabbage with water to make an indicator dye and had lots of fun teaching the kids about acids and bases. It's amazing what you can do with a red cabbage!}


3. In a large, nonstick skillet, heat the oil and remaining jalapeño half over medium-high heat; swirl to coat the bottom of the pan. Season the fish on both sides with salt and pepper. 

{Since we don't use nonstick pans, and I know from experience that fish can do an amazing job of attaching itself to a cooking surface, I decided to try breading the tilapia to see if that would reduce it's sticking power. In a small bowl, I combined about 1/2 cup of cornmeal and added about a teaspoon of salt and a small amount of pepper. I dredged the tilapia in the cornmeal mixture and set them aside.}

4. In two batches (starting with any larger pieces), cook the fish until golden brown on all sides, 5 to 6 minutes. Discard the jalapeño. 

{I do think that the cornmeal cover helped keep the fish from sticking to the pan and it wasn't very noticeable in the tacos.}


5. Meanwhile, warm the tortillas according to the package instructions (or over a gas burner until blistered in spots, holding each with tons and waving it from side to side.)

{I heated our tortillas at 350 degrees in the oven on cookie sheets for about 5 minutes. It seemed to work well.}

6. To make the tacos, fill the tortillas with slaw, fish, and fresh cilantro leaves. Drizzle with the reserved sour-cream mixture. Serve immediately. 

{Our fish tacos turned out really well and I would definitely make them again. They were supposed to feed 4 people but I think it could also feed 5 if you have extra tortillas. There were 3 of us at dinner (Woodley, Steven, and I). We each had 2 tacos and there was enough left over to make 4 more which Woodley and I will enjoy for lunch tomorrow! Yum!}

~ElizabethRose